


Interested in hearing more about this project? Listen to episode 55 of Home: On, the Digital Media Zone’s podcast about DIY home automation. Richard discusses this project with guest co-host Garry Whittaker, who has a garage door project of his own to share.
Did I leave the garage door open? That question haunts many people as they lie awake at night or drive away from their homes. At my house, we have multiple garage doors, so multiply that anxiety by n and sprinkle it with some OCD.
I’ve had aspirations of adding remote control and monitoring for the garage, but I’ve yet to find a solution (a) at a reasonable price that (b) seems easy enough to install myself and (c) will integrate with my existing smarthome systems. I had been waiting/betting on a HomeKit-compatible MyQ from Chamberlain, but I’m starting to doubt we’ll see one of those before I reach retirement age.
I compromised on a status-only solution, and so far I’m very happy with the results. Using a keypad, sensors, and some carefully thought-out notifications, I’ve implemented a pretty nice way of staying on top of the state of each of my garage doors. The links in this post will take you to the associated product pages at smarthome.com or Amazon if you’re interested in ordering any of these products for a project of your own.
Selecting Devices
Since my main control system in the house uses Insteon, I decided to use an Insteon keypad and sensors for this project. At the time of this writing, Insteon does not offer a tilt sensor. These are common in the Z-Wave world, but as of yet, they don’t exist for Insteon, so I chose Insteon’s wireless open/close sensors instead.
For door status indicators, I used three buttons on an 8-button Insteon keypad installed in the hall off the kitchen that leads to the back door, mudroom, and interior garage entrance. It’s a highly trafficked area, so the indicators are very noticeable. I have several of these keypads throughout my home, and I’m constantly touting their versatility on Home: On. They come in multiple colors, you can create your own button labels or order custom etched button caps, each button has its own controllable status light, and you can even customize that light with color lenses. I’ve done all of that.
I’m using Insteon’s cleverly-named 2245-222 Hub (formerly known as the Hub II), and for various reasons, I’m using Insteon’s own somewhat limited Insteon for Hub apps to manage and control the Insteon stuff in my home these days. As part of this solution, I wanted to stick with these products for any rules or notifications I created.
Mounting the Sensors
Using an open/close sensor on a garage door turns out to be trickier than you might expect. These sensors have two pieces that need to be mounted so that they’re together when the door is closed and apart when it’s open. Simple enough, right? Not so fast. It actually took me three tries to find the right mounting location. I first mounted the smaller magnet component on the side edge of the door, but it kept getting knocked off by the steel tension wires that ran along the track. Then I tried mounting it higher along the side, but I’d get too many false readings as the magnet slid into place next to the sensor.
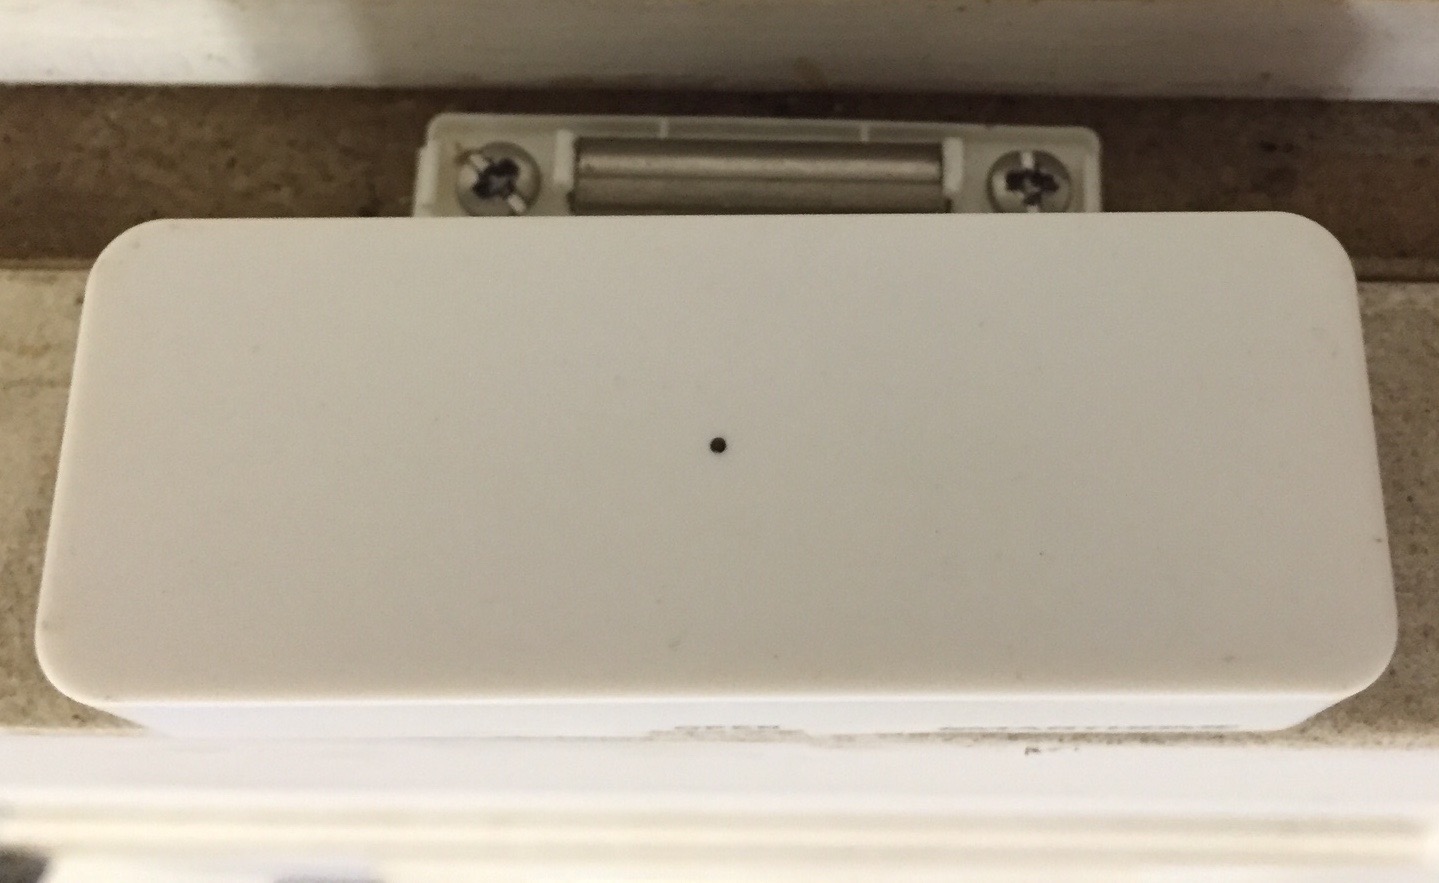
Ultimately, I decided to take a cue from the installed security system and mount the sensor at the top of the door. With the magnet mounted on the ledge atop the door frame and the sensor on the top edge of the door itself, the sensor worked exactly as I wanted it to. There are some YouTube videos showing other homeowners’ creative solutions to solving this problem. And I’m fairly certain now that we’ve all worked so hard to retrofit these sensors for garage doors that Insteon will shortly offer an actual tilt sensor for this purpose.
Installing the Keypad
Insteon’s keypad switches are designed to replace a single switch. The keypad itself can control one local load—the same as any standard switch or dimmer. Mind you, it doesn’t have to control a load, but that’s another project for another time. The other buttons on the keypad can each be a controller for other Insteon devices and also display status.
 The switch I replaced controlled a series of exterior accent lights, and I was already using other buttons on the keypad to also control decorative and security lights outside my garage. I chose three buttons—one to represent the status of each garage door, and popped off the default button caps to install red color change lenses for their status lights. And ultimately I ordered custom etched button caps to represent the three doors. It sounds expensive, but the Insteon keypad buttons are surprisingly economical measured against any comparable custom keypad solution—each button cost me a little over $6.
I followed one more step for each of the three buttons. Keypad buttons can be set to toggle something on or off (in which case the associated light can indicate the state of the controlled device(s)), or they can just trigger something to happen. By default, the buttons are set to toggle. Since I’m not yet integrating the ability to actually open and close the garage doors from the keypad, I didn’t want anyone to be able to press the button and change the indicator light—that could be confusing. So I changed the setting on each button so that if pressed it would just blink but maintain its state from before it was pressed. This is something you can set through the app when configuring the keypad or directly on the keypad through a series of taps and mystical chants.
Provisioning the Devices
Insteon gives you the ability to directly link devices to each other—no control hub or software necessary. Technically, I could have paired each of the sensors as a controller with one of the three buttons on the keypad acting as a responder (these are Insteon’s terms for devices that send signals, versus those that act on them, respectively). Don’t be tempted to do this. Like with many smarthome systems, it’s best to add the devices to the Insteon hub then link them all together through the control software.
Since I was already using the keypad, I didn’t need to add it to the system—so I just added the three new sensors. Adding Insteon sensors can be tricky, but the Insteon app does a good job of walking you through the process. Adding an Insteon device to the hub requires physically triggering the pairing process from the device itself, so it was nice that I could just use my iPhone for that while balancing on a ladder to press the set button on the sensors now mounted atop each garage door. (I probably should have considered adding the sensors to the system before I mounted them.)
Pairing the Sensors
 As I mentioned above, you’ll want to use Insteon’s app to pair devices. This ensures that no matter how something happens—whether it’s initiated from your app, a sensor, a wall switch, or a controller, everything will stay in sync to know the correct status of your devices. Trust me on this.
To pair devices in the Insteon for Hub app, you simply create a Scene with the associated devices. So I created a scene for each garage door, including the appropriate sensor and button I chose to associate with that specific door, and I set the button as a Responder to the sensor.
Once complete for each garage door, I had everything I needed to monitor the door status: When a door was open, its respective button glowed bright red, and when it closed, it dimmed to a lower light level. I could quickly determine the state of the three doors just by glancing over to the keypad from the kitchen or when walking in the back door.
But I wasn’t done yet.
Setting up Alerts
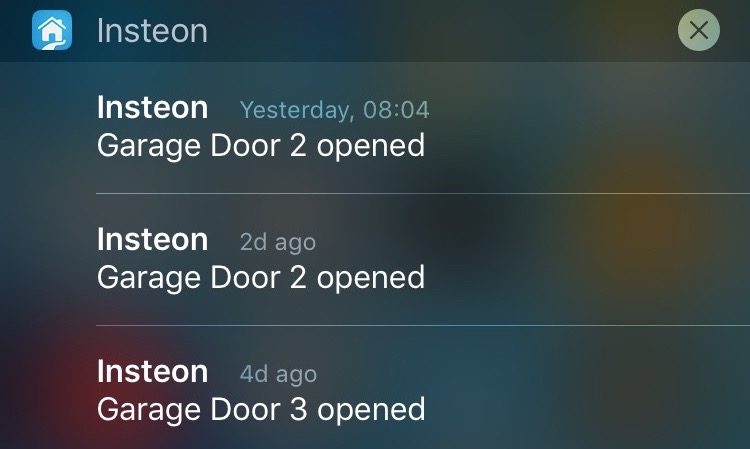
Before calling it a day, I wanted to set up some alerts. I wanted to be notified any time any garage door opened, and I wanted to be notified when the garage door for my car closes (so I can drive away before it’s fully closed).
Insteon offers two types of alerts: notifications and email messages. You can set up notifications using either the iOS or Android app. While the Windows and Windows Phone apps cannot [do a lot of things including] set alerts, they can receive notifications. In fact, notifications you set up from the Android or iOS apps will ultimately get sent to all devices where you’ve installed the Insteon for Hub app, regardless of the platform (including Windows platforms).
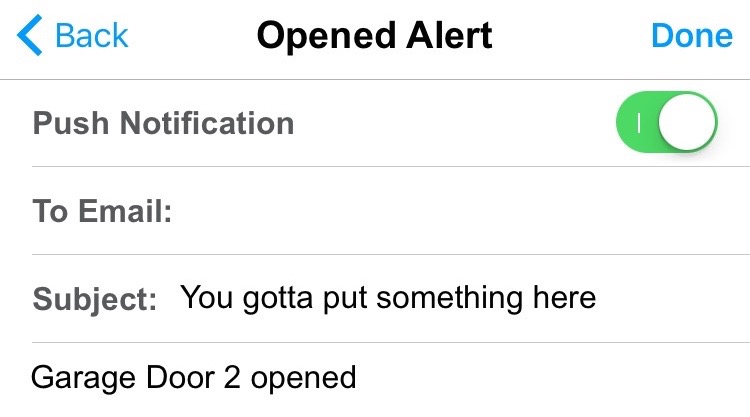
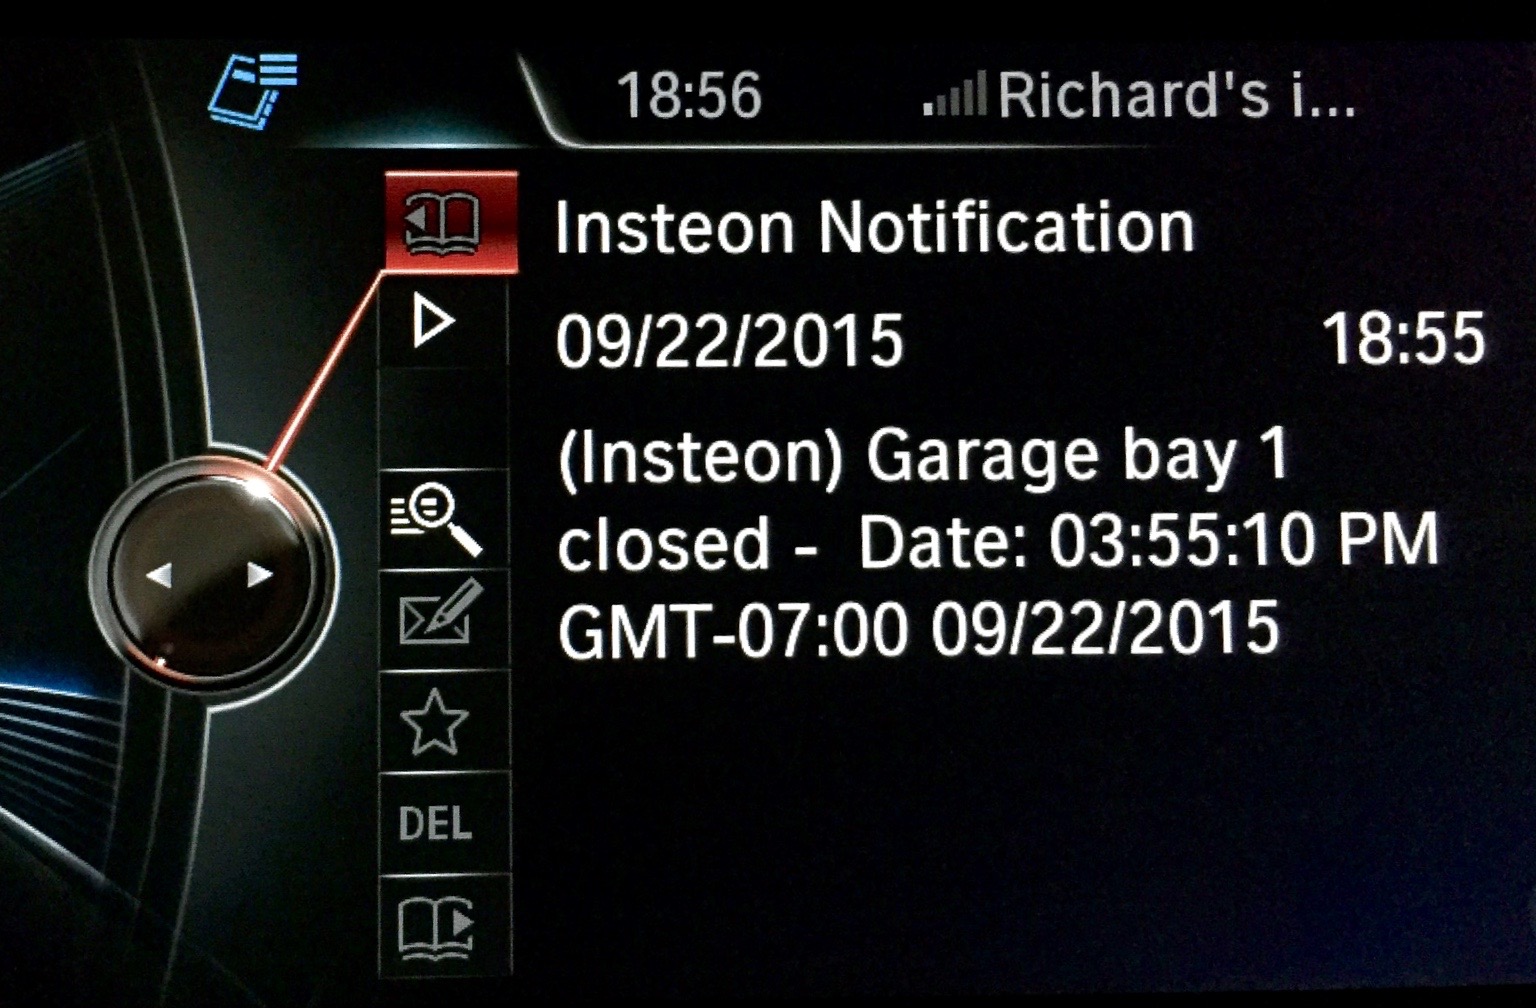
To set up the notifications, I edited the sensor devices in the Insteon app and enabled Opened Alerts. I learned early on that even though notifications do not display the Subject for the alert, you must put something in the Subject box or Insteon will never send the alert. For my garage bay, I set the Closed Alert to send an email message to the SMS email address for my phone. Why? Because my car will display text messages, so I’ll be able to see the message when it arrives, as I’m driving away, without having to look at my watch or phone.
Now I can rest at night knowing that the garage doors are closed.
Hmmm…I wonder if I left the oven on….


[…] Richard’s garage door monitor […]
Thanks! Very useful article, I am planning on doing something similar!